English
 Español
 Deutsch
 日本語
日本語I. Introduction: Why Is the Selection and Maintenance of Binder Chains Important?
In both daily office work and personal document organization, binder chains serve as the "connecting core" of loose-leaf notebooks and document binders. They hold scattered pages together securely, allowing users to add, remove, or rearrange pages flexibly—this flexibility is what makes loose-leaf systems so popular for note-taking, project planning, and long-term file storage. However, many people often overlook the importance of choosing the right binder chain and maintaining it properly, treating it as a "trivial accessory" rather than a key component that affects the usability of the entire loose-leaf system.
A poorly selected binder chain can lead to a series of troubles: a plastic chain that is too fragile may break easily when pages are turned frequently, causing documents to scatter; a metal chain that is not corrosion-resistant may rust over time, leaving stains on important papers; even a chain of the wrong size can fail to fit the loose-leaf holes, resulting in loose pages or difficulty in flipping. Similarly, neglecting maintenance exacerbates these issues—dust accumulated in the chain links can cause jamming when turning pages, and prolonged exposure to moisture or direct sunlight can accelerate the aging or deformation of the chain, shortening its service life significantly.
In fact, a high-quality, properly maintained binder chain not only ensures the integrity and order of documents but also extends the service life of the entire loose-leaf binder, reducing the need for frequent replacements. Whether you are organizing work reports, student notes, or personal handwritten diaries, the right binder chain and proper maintenance can make document management more efficient and worry-free. This section will further explain why paying attention to the selection and maintenance of binder chains is essential for smooth daily organization.
II. Choosing the Right Binder Chain: From Material to Size, Avoiding Selection Mistakes
Picking the correct binder chain is fundamental to maximizing the functionality of your loose-leaf system. A mismatched or low-quality chain can turn a convenient organization tool into a source of frustration—whether it’s pages falling out, difficulty flipping through documents, or premature wear. Yet many users rush this choice, focusing only on appearance or cost instead of practicality. To avoid these pitfalls, it’s critical to focus on two core factors: material durability and size compatibility.
1. How to Pick Durable Materials for Binder Chains?
The material of a binder chain directly impacts its lifespan, strength, and suitability for different uses. The most common options are metal and plastic, each with unique pros and cons that align with specific scenarios:
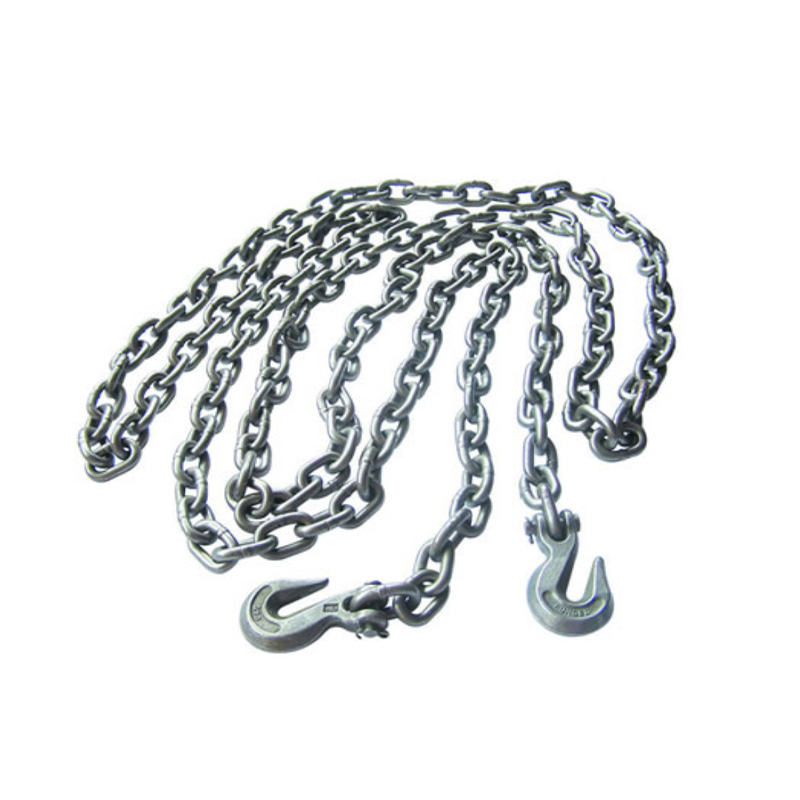
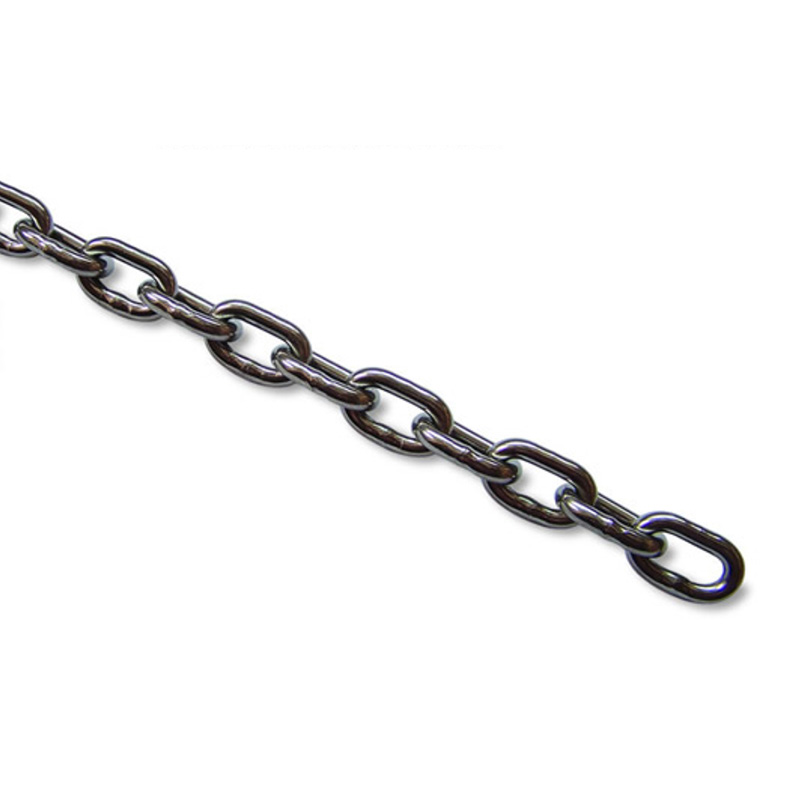
- Metal binder chains: Often made from stainless steel or coated steel, these chains excel at durability and load-bearing. They can handle thick stacks of paper (such as 100+ page project binders) and resist bending or breaking even with frequent use. Metal chains also hold up well in environments with temperature fluctuations, making them a reliable choice for office archives, workshop manuals, or outdoor activity logs. However, uncoated metal chains may rust if exposed to moisture—so if you plan to use the binder in humid spaces (like a garage or kitchen), opt for a rust-resistant coated version.
- Plastic binder chains: Typically crafted from high-density polyethylene (HDPE) or polypropylene, these chains are lightweight, affordable, and available in various colors (great for personal notebooks or kids’ school supplies). They’re rust-proof and won’t scratch delicate paper, making them ideal for lightweight uses like recipe binders, travel journals, or class notes. That said, plastic chains have limits: they can warp if exposed to high heat (e.g., left in a hot car) and aren’t strong enough for very thick paper stacks—using them for more than 50 pages may cause stretching or snapping.
The key is to match the material to your usage: for long-term, heavy-duty needs, metal is the better choice; for casual, lightweight, or colorful applications, plastic works well.
2. When to Use Small-Size Binder Chains, and What to Note?
Small-size binder chains—defined by shorter lengths, smaller link diameters, or narrower widths—are often underused but essential for specific loose-leaf setups where standard chains are too bulky.
They shine in compact binders: think pocket-sized memo books for on-the-go notes, mini planners for purse storage, or small craft binders for holding sticker sheets or fabric swatches. Standard chains would make these tiny binders heavy and hard to carry, but small-size chains keep them lightweight while still securing pages. They’re also useful for specialized items, like mini photo albums (to hold polaroids) or jewelry organizers (to attach earring cards), where standard chains would overpower the contents.
When choosing small-size chains, two details can’t be ignored:
- Hole alignment: Ensure the chain’s pins fit the hole size of your loose-leaf pages. A pin that’s too thick will jam; one that’s too thin will let pages slide around.
- Weight limits: Small chains have lower load capacity—stick to 20–30 pages max to avoid strain. Using them for thicker stacks will lead to frequent breakages.
By prioritizing material suitability and size accuracy, you can skip the common mistakes that make binder chains more hassle than help. The right chain won’t just hold your pages together—it’ll make organizing smoother, longer-lasting, and tailored to your needs.
III. Binder Chain Installation: Step-by-Step to Avoid Mistakes
Installing a binder chain might seem simple, but rushing through it or skipping small steps often leads to headaches later—like pages getting stuck, chains slipping out, or even damaging the loose-leaf cover. With a little patience and the right approach, you can get it right on the first try, so your binder works smoothly for months.
1. Prep Work Before Installing a Binder Chain
First, gather the basic tools you’ll need—nothing fancy, just items you probably already have at home or in the office: a pair of small tweezers (to handle tiny chain links if needed), a ruler (for aligning holes), and a soft cloth (to wipe off any dust on the binder or pages). Avoid using sharp tools like scissors or knives, as they could tear the paper or scratch the binder cover.
Next, double-check if the chain fits your binder and pages—this is the most common mistake people make! Count the number of links on the chain and match it to the number of holes in your loose-leaf pages (e.g., a 6-link chain needs 6 holes). Also, check the diameter of the chain’s pins: if the pin is too thick, it won’t go through the holes; if it’s too thin, the pages will wiggle around. If the chain and holes don’t match, stop here—using the wrong size will only cause problems later.
2. Detailed Binder Chain Installation Guide
Follow these steps slowly, and you’ll avoid misalignment or damage:
- Step 1: Mark the hole positions (if needed). Lay your loose-leaf pages flat on a table, then place the binder cover on top. Use the ruler to line up the holes—make a tiny pencil mark next to each hole on the cover (you can erase it later) to ensure the chain stays straight. This is especially helpful if your binder doesn’t have pre-marked guides.
- Step 2: Thread the chain through the holes. Hold the chain with one hand (or use tweezers for small chains) and start with the first hole on the left. Push the chain’s pin gently through the hole—don’t force it! If it gets stuck, check if the pin is aligned straight; bending it to fit will break the chain. Continue threading each pin through the corresponding hole until all links are through the pages and cover.
- Step 3: Secure the chain ends. Most binder chains have a small clip or stopper on one end. Once all links are threaded, fold the stopper down (or snap it into place) to hold the chain in. Give the chain a light tug to make sure it doesn’t come loose—if it slides out, re-secure the stopper; it might not have been locked properly.
3. Fixing Common Post-Installation Issues
Even if you follow the steps, small problems can pop up—here’s how to fix them:
- Chain jams when flipping pages: This usually means a link is misaligned. Open the binder, check each link to see if any are twisted or pushed too far through a hole. Gently straighten the twisted link or adjust its position until it moves smoothly.
- Pages shift side to side: The chain’s pins are probably too thin for the holes. You can add a small piece of tape (sticky side out) around the pin (just enough to thicken it slightly) to keep pages in place—avoid using too much tape, though, or it will stick to the paper.
- Chain comes loose from the cover: The stopper might be worn out. If the chain has a removable stopper, replace it with a new one (you can find basic stoppers at office supply stores, no brands needed); if it’s built-in, bend the stopper slightly more to create a tighter hold.
Take your time with installation, and these small checks will save you from having to re-do the work later. A well-installed binder chain should let you flip pages easily and keep your documents secure—no more chasing loose pages around!
IV. What to Do When a Binder Chain Breaks? Learn Replacement Steps Easily
A broken binder chain can disrupt your document organization—pages may scatter, your loose-leaf binder becomes unusable, and important notes or files could get lost. But replacing a binder chain doesn’t require professional skills; with the right preparation and step-by-step approach, you can fix it yourself in minutes. The key is to first confirm whether replacement is necessary, then select a matching new chain, and follow proper steps to avoid damaging your binder or pages.
1. How to Judge If a Binder Chain Needs Replacement?
Not all minor issues mean you need a new chain—sometimes a quick adjustment (like straightening a twisted link) works. But the following problems indicate it’s time to replace the chain, as repairs will only be temporary:
- Complete or partial breakage: If the chain has a snapped link (metal chains may split; plastic chains may crack into pieces) or a missing section, it can no longer hold pages securely. Even a small break will worsen with use, leading to pages falling out.
- Permanent deformation: Metal chains that are bent beyond straightening (e.g., links are crushed or twisted into an unworkable shape) or plastic chains that are warped (from heat or pressure) won’t align with binder holes. Flipping pages will cause jams, and the chain may damage page edges.
- Failed closure/securing mechanism: Most chains have a stopper or clip to keep them attached to the binder. If the stopper is lost, broken, or won’t lock (e.g., plastic stoppers that have snapped off, metal stoppers that won’t bend to hold), the chain will slide out of the holes every time you use the binder.
- Severe wear or corrosion: Metal chains that are heavily rusted (rust may stain pages) or plastic chains that are brittle (they crumble when touched) have reached the end of their lifespan. Even if they still “work,” they’ll break soon and risk ruining your documents.
2. Preparation Before Replacement: Select a Matching New Chain
The biggest mistake during replacement is choosing a new chain that doesn’t fit your existing binder or pages. To avoid this, first record key parameters of your old chain, then match them to the new one. Use the table below to compare and verify:
| Parameter to Check | How to Measure the Old Chain | Why It Matters for the New Chain | Common Mistakes to Avoid |
| Length of the Chain | Lay the old chain flat; measure from the first link to the last link (excluding the stopper). | A chain that’s too short won’t cover all binder holes; too long will hang loose and catch on things. | Guessing length by eye—e.g., buying a “standard” 8-inch chain for a 6-inch binder. |
| Number of Links/Holes | Count how many links the old chain has (each link corresponds to one binder hole). | The new chain’s link count must match the number of holes in your binder and pages. | Ignoring hole count—e.g., a 6-link chain for an 8-hole binder will leave 2 holes unused. |
| Material Type | Check if the old chain is metal (stainless steel, coated steel) or plastic (HDPE, polypropylene). | Matching material ensures consistency in durability and use scenarios (e.g., metal for heavy pages, plastic for light use). | Switching to an incompatible material—e.g., plastic chain for a thick stack of 100+ pages (it will snap). |
| Pin Diameter | Use a ruler to measure the thickness of the chain’s pins (the parts that go through binder holes). | Pins that are too thick won’t fit through holes; too thin will let pages slide around. | Assuming “one size fits all”—e.g., using a 3mm pin for 2mm holes (it will tear paper). |
Once you have these parameters, you can select a new chain that matches exactly. For example, if your old chain is a 7-inch metal chain with 5 links and 2.5mm pins, look for a new chain with the same specs—no need for brand names; basic, unbranded chains from office supply stores or general retailers will work.
3. Step-by-Step Binder Chain Replacement
With a matching new chain ready, follow these steps to replace the old one safely:
Step 1: Remove the Old Broken Chain
- Start by opening the binder and laying it flat on a table. If the chain has a stopper or clip, first unlock or remove it (for plastic stoppers, gently pry them off with tweezers; for metal stoppers, bend them back to release the chain).
- If the chain is broken, be careful with sharp edges (especially metal chains)—use tweezers to hold small broken pieces instead of your fingers. Pull the old chain out of the binder holes one link at a time. If a link is stuck (e.g., a twisted metal link jammed in a hole), wiggle it gently or use a toothpick to loosen it—never force it, as this can tear the binder’s hole edges.
- Once the old chain is fully removed, set it aside (you can recycle metal chains; discard broken plastic chains properly).
Step 2: Clean the Binder Holes and Pages
Old chains often leave dust, paper scraps, or rust (for metal chains) in the binder holes. This debris can cause the new chain to jam, so take 1–2 minutes to clean:
- Use a soft brush (like a small paintbrush or makeup brush) to sweep out debris from each hole. For stubborn scraps, wrap a piece of tape around your finger (sticky side out) and gently dab inside the holes to pick up dirt.
- If the binder cover or pages have rust stains from the old chain, wipe them with a damp cloth (for paper pages, use a slightly damp cotton swab to avoid soaking the paper). Let everything dry completely before installing the new chain—moisture can damage the new chain (especially metal) or the pages.
Step 3: Install the New Chain (Follow Alignment Tips)
The installation process is similar to the initial setup, but with extra attention to matching the new chain to the holes:
- First, double-check the new chain’s parameters against your old chain (use the table above) one last time—confirm link count, pin diameter, and length are correct.
- Lay the binder and pages flat, then thread the new chain’s pins through the holes starting from the leftmost hole. Push each pin gently; if it doesn’t fit, stop—you may have picked the wrong pin diameter (do not force it, as this will stretch the holes).
- Once all links are threaded, attach the new chain’s stopper or clip. For plastic stoppers, press them firmly into place until you hear a “click”; for metal stoppers, bend them slightly to lock the chain in.
- Give the new chain a light tug to test its security—if it stays in place, you’re done. If it slides out, recheck the stopper (it may not be fully locked) or the chain’s fit (e.g., too-short length causing the stopper to pop off).
Step 4: Test the New Chain
After installation, flip through the binder pages several times to ensure the new chain works smoothly:
- Check if pages flip without jamming—if a link catches, adjust the chain’s alignment (a misaligned link may be pushed too far through a hole; gently pull it back to center).
- Verify that pages don’t slide side to side—if they do, the new chain’s pins may be too thin. Fix this by wrapping a tiny piece of tape around each pin (just enough to thicken it slightly) — avoid over-taping, as this can make pages stick together.
4. Key Notes to Avoid Damage During Replacement
- Don’t use sharp tools: Scissors, knives, or screwdrivers can tear binder covers, ruin page edges, or scratch your table. Stick to tweezers, soft brushes, and rulers.
- Don’t over-tighten the stopper: Forcing a stopper to “lock” too tightly can break the new chain (especially plastic) or warp the binder’s edge. A secure fit that doesn’t slide out is enough—you don’t need to bend metal stoppers until they’re flat.
- Don’t mix chain parts: Never combine links from the old chain with the new one (even if they look similar). Mismatched links will cause misalignment and breakage.
By following these steps, you can replace a broken binder chain quickly and ensure your loose-leaf system works like new. The most important part is taking the time to match the new chain to the old one’s parameters—this avoids repeat replacements and keeps your documents organized without hassle.
V. Extending Binder Chain Lifespan: Maintenance Tips to Keep in Mind
A well-maintained binder chain doesn’t just hold your documents together—it saves you time and effort by avoiding frequent replacements. Whether your chain is made of metal or plastic, small, consistent care habits can double or even triple its lifespan. Many users unknowingly shorten their chain’s life with simple mistakes (like leaving it in a damp bag or yanking pages), but with targeted maintenance, you can keep your binder chain working smoothly for years. Below is a breakdown of daily care practices, material-specific tips, and solutions for long-term storage—all designed to protect your chain without needing special tools or products.
1. Daily Maintenance: Avoid Small Mistakes That Shorten Lifespan
Most binder chain damage starts with small, repeated actions. By adjusting how you use and handle your binder, you can prevent unnecessary wear. Here are the key daily habits to adopt:
a. Handle with Gentle Force (No Yanking or Prying)
The #1 cause of broken links or bent pins is rough handling. When flipping pages, use a smooth, steady motion—don’t pull pages hard to “jump” to a section, as this puts extra strain on the chain’s links. If a page gets stuck (e.g., from a crumpled edge), gently wiggle it free instead of prying it with your fingers or a tool (which can bend the chain’s pins). For thick binders (50+ pages), hold the binder’s spine with one hand while flipping pages with the other—this distributes weight and reduces pressure on the chain.
b. Clean Regularly to Prevent Debris Buildup
Dust, paper scraps, and even small bits of tape can get stuck in the gaps between chain links. Over time, this debris causes jamming (making pages hard to flip) and wears down the chain’s surface (e.g., scratching metal or wearing away plastic). To clean:
- Quick daily wipe: After using the binder, run a dry, soft cloth (like a microfiber cloth or old cotton t-shirt) along the chain to brush away surface dust.
- Deep clean every 2–3 weeks: For stuck debris, use a cotton swab (slightly dampened with water—not soap) to gently scrub between links. For metal chains, dry the swab thoroughly after wiping to avoid moisture buildup. Never use harsh cleaners (like bleach or alcohol) — they can discolor plastic or strip protective coatings from metal.
c. Protect from Extreme Conditions
Binder chains (especially plastic ones) are sensitive to temperature and moisture. Avoid these common environmental mistakes:
- No hot surfaces: Don’t leave your binder on a laptop, coffee maker, or windowsill that gets direct sunlight (plastic chains will warp; metal chains may heat up and damage pages).
- No damp spaces: Keep binders out of backpacks with water bottles, bathroom cabinets, or basements—moisture causes metal chains to rust and plastic chains to develop mold (which stains pages). If your binder gets wet, dry the chain immediately with a cloth and leave the binder open to air out for a few hours.
2. Material-Specific Maintenance: Metal vs. Plastic Chains
Metal and plastic binder chains have different weaknesses—so their care routines need to be tailored. The table below breaks down the key differences, including common issues, targeted solutions, and tools to use:
| Aspect | Metal Binder Chains (Stainless Steel/Coated Steel) | Plastic Binder Chains (HDPE/Polypropylene) |
| Key Weaknesses | Rust, scratched coatings, bent pins | Warping, brittleness (from UV/heat), cracking |
| Daily Care Focus | Prevent moisture buildup; avoid bending pins | Keep away from heat/UV; avoid sharp impacts |
| Rust Prevention |
|
N/A (plastic doesn’t rust, but moisture can cause mold: Wipe moldy areas with a dry cloth; discard if mold seeps into links). |
| Wear & Tear Fixes |
|
|
| Tools to Use | Soft cloth, cotton swabs (dry or slightly damp), dry toothbrush, clear nail polish (optional) | Soft cloth, cotton swabs (dry only), heavy flat object (for warping) |
| Tools to Avoid | Harsh cleaners, wet sponges, sharp tools (scissors, screwdrivers) | Hot objects, UV light (direct sunlight), sharp tools |
3. Long-Term Storage: Keep Unused Chains in Good Condition
If you have extra binder chains (or a binder you won’t use for months, like seasonal project notes), improper storage can ruin them before you even use them. Follow these steps to keep unused chains intact:
Step 1: Disassemble (If Possible)
For binders you’re storing, remove the chain from the binder first. This prevents the chain from pressing against the same set of holes for months (which can stretch the holes or bend the chain). For loose chains, separate them by material (metal vs. plastic) to avoid scratching (metal can scratch plastic if stored together).
Step 2: Clean Thoroughly Before Storing
Even if the chain looks clean, wipe it with a dry cloth to remove any invisible dust or oil (from your fingers). For metal chains, do a final check for rust spots—treat small spots with a dry toothbrush (as in the table above) to prevent them from spreading. For plastic chains, ensure there’s no moisture (even a tiny bit can cause mold in closed storage).
Step 3: Choose the Right Storage Container
- Metal chains: Store in a dry, airtight container (like a plastic zip-top bag or a small cardboard box) with a packet of silica gel (optional—this absorbs moisture to prevent rust). Avoid metal containers (they can trap moisture).
- Plastic chains: Store in a cool, dark place (away from windows) in a paper bag or a breathable container (not airtight—plastic needs slight airflow to avoid developing a “sticky” surface over time). Never store plastic chains near rubber items (like erasers) — rubber chemicals can melt plastic.
Step 4: Check Every 3–6 Months
Even in storage, check the chains periodically. For metal chains, look for rust; for plastic chains, check for brittleness or warping. If you notice issues, address them immediately (e.g., replace the silica gel for metal, move plastic chains to a cooler spot).
4. Common Maintenance Myths to Debunk
To avoid wasting time (or damaging your chain), let’s clear up two common misconceptions:
- Myth 1: “Oiling metal chains will keep them from rusting.”
False. Most binder chains are coated to resist rust—oil will attract dust, which builds up and causes jamming. Stick to dry cleaning and moisture prevention instead. - Myth 2: “Plastic chains don’t need maintenance—they’re ‘indestructible.’”
False. Plastic breaks down over time with UV exposure or heat, even if you don’t use it. A plastic chain left in a car for a summer will warp beyond use—so proper care is just as important as it is for metal.
By combining daily gentle handling, material-specific care, and smart storage, you can make your binder chains last for years. The best part? These tips don’t require any special products—just a few minutes of your time each week. A well-maintained chain not only saves you money (no need to buy replacements) but also keeps your documents organized and intact—so you never have to chase loose pages again.
VI. Conclusion: Use Binder Chains Well to Make Document Organization More Efficient
Binder chains, though often seen as a “small accessory” in document organization, are actually the backbone of a smooth, efficient loose-leaf system. Think about it: a mismatched, poorly installed, or neglected binder chain can turn a simple task—like flipping to a meeting note or adding a new project page—into a frustrating ordeal: pages slip out, links jam, or chains break, forcing you to pause and fix the issue instead of focusing on your work. Conversely, when you master the art of choosing, installing, maintaining, and replacing binder chains correctly, you transform your loose-leaf binder from a basic storage tool into a productivity booster. This conclusion will recap the core lessons from earlier sections, tie them to real-world efficiency gains, and provide a clear roadmap for applying these skills—so you can spend less time troubleshooting chains and more time managing your documents.
1. Recap: The “Four Pillars” of Using Binder Chains Effectively
Every step of interacting with binder chains—from selection to maintenance—builds on the last, creating a cycle that keeps your system running smoothly. Below is a breakdown of the four key pillars, with their most critical takeaways (the “non-negotiables” that directly impact efficiency):
a. Pillar 1: Choose the Right Chain (Don’t Guess)
The foundation of efficient document organization is a chain that fits your needs exactly. As we covered earlier, this means prioritizing two factors:
- Material match: Metal chains for heavy-duty use (thick stacks, long-term storage, or high-frequency flipping) and plastic chains for lightweight tasks (casual notes, kids’ supplies, or temporary projects). Choosing the wrong material (e.g., plastic for a 100-page work binder) leads to frequent breaks, forcing you to stop and replace the chain mid-task.
- Size accuracy: Link count must match your binder’s hole number, pin diameter must fit hole size, and length must align with your binder’s spine. A chain that’s too short or has mismatched pins will cause pages to shift or jam—wasting time as you adjust pages instead of accessing them quickly.
b. Pillar 2: Install Correctly (Avoid “Do-Overs”)
A rushed installation is a recipe for inefficiency. The key steps to get it right the first time are:
- Prep first: Gather basic tools (tweezers, ruler) and double-check chain-binder compatibility—this avoids stopping halfway through to hunt for tools or realize the chain doesn’t fit.
- Follow the 3-step process: Mark holes for alignment, thread pins gently (no forcing), and secure the stopper tightly. Skipping these steps (e.g., not marking holes) leads to misaligned links that jam when flipping pages—costing you extra time to disassemble and reinstall.
c. Pillar 3: Replace Proactively (Don’t Wait for a Break)
Waiting until a chain snaps (and scatters your pages) is a major efficiency killer. Instead, use the “replacement checklist” from earlier:
- Replace chains if you see permanent damage (breakage, severe rust, warping) or failed stoppers.
- Always match the new chain to the old one’s parameters (length, link count, material, pin diameter)—using a mismatched chain will just repeat the problem. Proactive replacement takes 5 minutes; fixing a broken chain mid-work can take 30 minutes (plus the stress of retrieving lost pages).
d. Pillar 4: Maintain Consistently (Extend Lifespan, Reduce Hassle)
Regular maintenance doesn’t just make chains last longer—it keeps them working smoothly, so you never have to waste time on avoidable issues. The core habits are:
- Daily care: Gentle handling (no yanking pages), quick dust wipes, and keeping chains away from heat/moisture.
- Material-specific care: For metal, prevent rust with dry cleaning; for plastic, avoid UV/heat to stop warping.
- Storage sense: Clean and separate unused chains, store them in dry/cool spaces—this means you’ll always have a working spare when you need it, no last-minute scrambles.
2. The Efficiency Impact: How Good Binder Chain Habits Save Time
To make the “efficiency” benefit tangible, let’s compare the time and frustration of “poor chain habits” vs. “good chain habits” across a typical month. This table quantifies the difference—showing how small, consistent choices add up to big time savings:
| Scenario | Poor Binder Chain Habits (No Planning/Care) | Good Binder Chain Habits (Proactive Selection/Maintenance) | Monthly Time Saved |
| Page Retrieval | Spend 2–3 minutes per day fixing jammed links or chasing loose pages (e.g., a misaligned chain makes flipping slow). | Pages flip smoothly; no stops—10–15 seconds per retrieval. | ~5 hours |
| Chain Replacement | 1–2 broken chains per month; each takes 30 minutes to fix (hunt for a new chain, clean up scattered pages). | 0–1 proactive replacements per month; takes 5 minutes (matching parameters, quick install). | ~45 minutes |
| Document Damage | Rust/stained pages from metal chains; warped plastic chains ruin binder covers—1–2 hours to copy damaged docs. | No damage; pages and binders stay intact. | ~2 hours |
| Storage/Spare Chains | Can’t find spare chains; spend 1 hour per month buying replacements (guessing size, multiple trips). | Spare chains stored organized; grab a matched one in 2 minutes. | ~58 minutes |
| Total Monthly Impact | ~8.5 hours wasted on chain-related issues. | ~12 minutes spent on proactive care/replacement. | ~8.3 hours |
This table makes it clear: good binder chain habits don’t just “keep chains working”—they free up hours of time you’d otherwise spend on fixes, replacements, and damage control. For anyone using binders for work, school, or home organization, that’s time better spent on tasks that matter (like finishing a project, studying, or organizing other areas of life).
3. Action Steps: Start Using Binder Chains Efficiently Today
To turn these lessons into practice, follow this simple 3-step roadmap—designed to be actionable, even if you’re short on time:
Step 1: Audit Your Current Binder Chains (10 Minutes)
Grab all your binders and check each chain against the “key parameters” we covered:
- Material: Is it metal (for heavy use) or plastic (for light use)? Does it match the binder’s purpose?
- Size: Do the link count/pin diameter fit the binder holes? (Count links, measure pins with a ruler if needed.)
- Condition: Are there signs of rust, warping, or broken links? Mark any chains that need replacement.
Step 2: Fix 1 “High-Impact” Issue This Week (15 Minutes)
Pick the problem that’s causing you the most frustration right now—e.g., a jammed chain in your work binder, or a rusty chain staining your notes—and fix it:
- If it’s a jam: Disassemble the chain, clean debris, and reinstall (follow the installation steps from Section III).
- If it needs replacement: Use the old chain’s parameters to pick a matching new one, then replace it (Section IV).
Step 3: Add 1 Maintenance Habit to Your Routine (2 Minutes/Day)
Choose one easy habit to start with—e.g., wiping your chain with a dry cloth after using the binder, or checking for rust on metal chains once a week. Consistency matters more than perfection; even 2 minutes a day will keep chains in good shape.
4. Final Thought: Binder Chains as a “Efficiency Catalyst”
At first glance, a binder chain might seem too small to impact your overall productivity. But efficiency often lives in the details: the tools that work seamlessly in the background let you focus on the work itself. A well-chosen, properly installed, and maintained binder chain doesn’t just hold your pages together—it holds your organization system together. It means no more pausing to fix jams, no more reprinting damaged pages, no more wasting time on avoidable headaches.
By applying the lessons from this guide—choosing wisely, installing carefully, replacing proactively, and maintaining consistently—you’ll turn a simple accessory into a catalyst for smoother, faster, and less stressful document organization. Whether you’re managing work projects, student notes, or family records, the goal is clear: let the binder chain work for you, not against you. With these skills, you’ll spend less time fighting with your binder and more time making the most of the documents it holds.
FAQ (Frequently Asked Questions)
- Q: I’m not sure whether to choose a metal or plastic binder chain—how do I decide based on my needs?
A: The key is to match the chain material to your usage frequency and page load. If you’re using the binder for heavy-duty tasks (e.g., storing 50+ work documents, frequent page flipping, or long-term archiving), metal chains are better—they’re durable, resist bending, and handle thick stacks. For lightweight use (e.g., casual notebooks, kids’ school supplies, or temporary project notes), plastic chains work well—they’re lightweight, affordable, and won’t scratch delicate paper. A quick test: if you’ll use the binder more than 3 times a week or store over 30 pages, go with metal; otherwise, plastic is sufficient. - Q: After installing a new binder chain, my pages still feel loose or jam when flipping—what’s wrong and how to fix it?
A: Loose pages usually mean the chain’s pin diameter is too small for your binder holes. Fix this by wrapping a tiny piece of clear tape (sticky side out) around each pin—just enough to thicken it slightly (avoid over-taping, which can stick to pages). For jamming, the issue is often debris in the chain links or misaligned links. First, use a cotton swab to clean dust/scraps from between links; if jamming persists, check if any links are twisted—gently straighten them with tweezers. Also, ensure the chain’s stopper is fully locked—an unlocked stopper can shift the chain and cause jams. - Q: My metal binder chain has small rust spots, and my plastic chain is starting to warp—can I fix these, or do I need to replace the chains?
A: For small rust spots on metal chains: Yes, you can fix them! Use a dry toothbrush to gently scrub the rust (avoid water, which spreads rust) until the spots are gone. Then wipe the chain with a dry cloth to remove loose rust particles. If the rust has eaten through the chain (creating holes) or covers more than half the links, replace the chain—rust will keep spreading and stain your pages. For warped plastic chains: Try reshaping first—lay the chain flat on a table, place a heavy (cool) object (like a book) on top, and leave it for 24 hours. If the chain still won’t hold its shape or has cracks, replace it—warped plastic can’t reliably secure pages, and cracks will worsen with use.